Wednesday, February 1, 2012

Imagine the Impossibilities


Thursday, January 12, 2012

So, I have to be honest, the first thing that came to mind when I heard about the Impossibilities Challenge was wallpaper. I have a hallway that I believe was once wallpapered before.  I think it is a plaster wall and it has a very strange texture. I painted it a lovely shade of gray (my favorite color). I painted right up the stairs meeting up to a nice buttery yellow. It's been a few years now and the paint is chipping all over the place. It's disturbing and upsetting mainly because I do not like house painting even a tiny bit and the thought of picking up a roller again is heartbreaking. I'm also not a big fan of wallpaper, I should actually say that I'm not a big fan of wallpaper that has fruits and eggplants and strange vines on it. That is what I was faced with in the house when I first moved in. Miles and miles of wallpaper. I fought with it so much it made me cry.

The fact that I would even consider hanging wallpaper back up is mind boggling, but I've decided it's the best decision. I went to the wallpaper store and informed the woman that I wanted something simple and gray. The first thing I picked I guess had glass beads involved and she basically told me no. We came up with this textured paper that has a checkerboard pattern on it.
I know I'm not taking any big risks with this one, but I really just wanted a gray wall so I think this will look nice.  She raised her eyebrows at me numerous times when I told her I would be going up the stairs with it and doing it myself. So, after much debate with my husband I have decided to already abandon this impossibility and make it a very possible goal by hiring someone to do it for me and making all the bad dreams of cutting angles and wallpaper paste disappear for good.  With all of the painting I have done in this house I will enjoy having someone else do it for me this time.

So, what's next? Finish Gone With the Wind? Maybe sometime in my thirties.

What I really really want to accomplish is sewing. It's been my life dream to know how to sew. Sure, I can make my sons their Halloween costumes but I struggle. I have a grandmother that is an expert, why do I not know? So, I have been sneaking away to get a few lessons from her, we are making a button down shirt. She assures me that once I'm done with that I will have a lot of useful knowledge under my belt. But she lives a couple of hours away and we haven't even gotten to the arms yet.

I need to do something now to keep this dream alive. So, by the end of January, I will be sewing myself a dress... no sleeves... little aggravation... just a little jumper. That's it. I will have to escape up to my "craft hole" (that's what I call because of the slanted ceilings I bump my head on and this crazy dark blue carpet). If I can pick up just an ounce of confidence I think it will be the start of something great!
My stack of vintage patterns I buy on Ebay and my fabric

So Cheers to conquering the Impossible!  Let's Go 2012!

Green Striped Men's Hat


Wednesday, January 11, 2012
I think my husband was getting a little jealous with all this hat making (before The Little Man Hat I had made two for my sister and sister-in-law).  He requested a gray hat and a green stripe using the green from Little Man's (Aslan Alpaca Basil).  So while in Saratoga over winter break I stopped byCommon Thread on Beekman Street.  I bought some gray Invernal yarn and it ended up having kind of a green cast to it so it was pretty perfect.  It's a very cozy, warm and modern and he actually likes it (which is kind of amazing)!

This one I did totally by measuring not row counting. I still used the size 5 circular needles and a set of double sided needles as well.

I cast on 100 stitches and k1, p1 the ribbing for 2 inches (I wanted it a thicker ribbing just because of the shape of his head)
I measured his head like I did here so I knew how long the hat needed to be before I started rounding it off (about six inches).

Then I just knit(in the knit stitch) for 3 inches until I wanted to make the green stripe. I made the stripe about 1/2inch long, five rows.

Then I changed back to my gray yarn and knit 1 1/2 inches before I began my spiral decreasing in the same manner as here. Where I *(ktog2 k23),repeat from *. Next row *(ktog2 k22), repeat from *. and continued to decrease in that manner

Et voila:
Wouldn't you know it, but after all this hat making I actually lost my own hat.  I guess I have my next knitting project!  

Avocado and Bacon 'Chos


Tuesday, January 10, 2012
I have an overwhelming love for nachos.  I think one of my favorite inventions might be the scoop tortilla chip.   Really, I mean it, it's just so little and bite size and you can fill it with anything.  I think there should be a restaurant with a menu filled with nachos... the possibilities are endless.  I'm going to try my best to figure out all the different things you can put on a chip and make it taste yummy.

For this recipe I modified my taco night avocado mixture (which I will be posting soon).  The only thing I left out here is the onion mainly because I didn't want to chop one.

I began the avocado filling by slicing up a tomato into little chunks. Then I sliced my avocado into little pieces as well and added them to a bowl.  Then I added a dash of pepper, a generous pinch of salt, a 3-4 teaspoons of coriander (one of my favorite spices which I use constantly because I can never use cilantro fast enough before it goes bad).  And a few shakes of garlic powder.  Gently mix it up so that you don't completely crush the avocado.  Then you just place a spoonful in each chip.

This was going to be my complete filling for my chip (and probably would have been tasty) until my husband was making a BLT and I decided I too must have bacon!  Why not throw some on these little guys?  Sounds good to me!  I had him make me a few slices and just chopped it into bits.  Drizzled the pieces on top of the avocado mixture.

Then came the cheese.  I piled a generous amount of cheese on each chip like a little nest of grated up goodness.

Popped them in the oven for five minutes at 350F and out they came.  But wait they needed something... sour cream!  Yes, yes, that was perfect!
Et Voila:


These were scrumptious! (yeah I'm not losing any weight)!

I added this recipe here:


But the Dough Was Pretty


Monday, January 9, 2012
I don't know where I went wrong here... I don't know how I could have possibly messed up blueberry muffins but I think I did somehow. Any suggestions...gentle now gentle... on why these didn't brown?

My obvious thought was that I didn't cook them long enough. When I did the toothpick test they were perfect, but I threw them back in anyway. After five minutes they still weren't turning brown. So, maybe they are meant to be whitish? They are pretty, but actually aren't that appetizing without that brownness to them...you know what I mean? They look more like biscuits with blueberries!  They offered some additional recipes for glazes and a cinnamon sugar topping that I think you would have to use if making these again.

On top of it all the blueberries were really tart (which of course the editors of Cooks Illustrated warned me of but I didn't read thoroughly... they said for sure in the winter to use frozen wild blueberries), Whoops! Bust!

What did go right was that the dough was really lovely looking and my ice cream scooper was amazing at filling the cups which is usually a big mess. The muffin was really moist and tasted delicious beyond the tart blueberries.  Most of all the house smelled lovely. So that's something to take away!  I will try them again for sure.

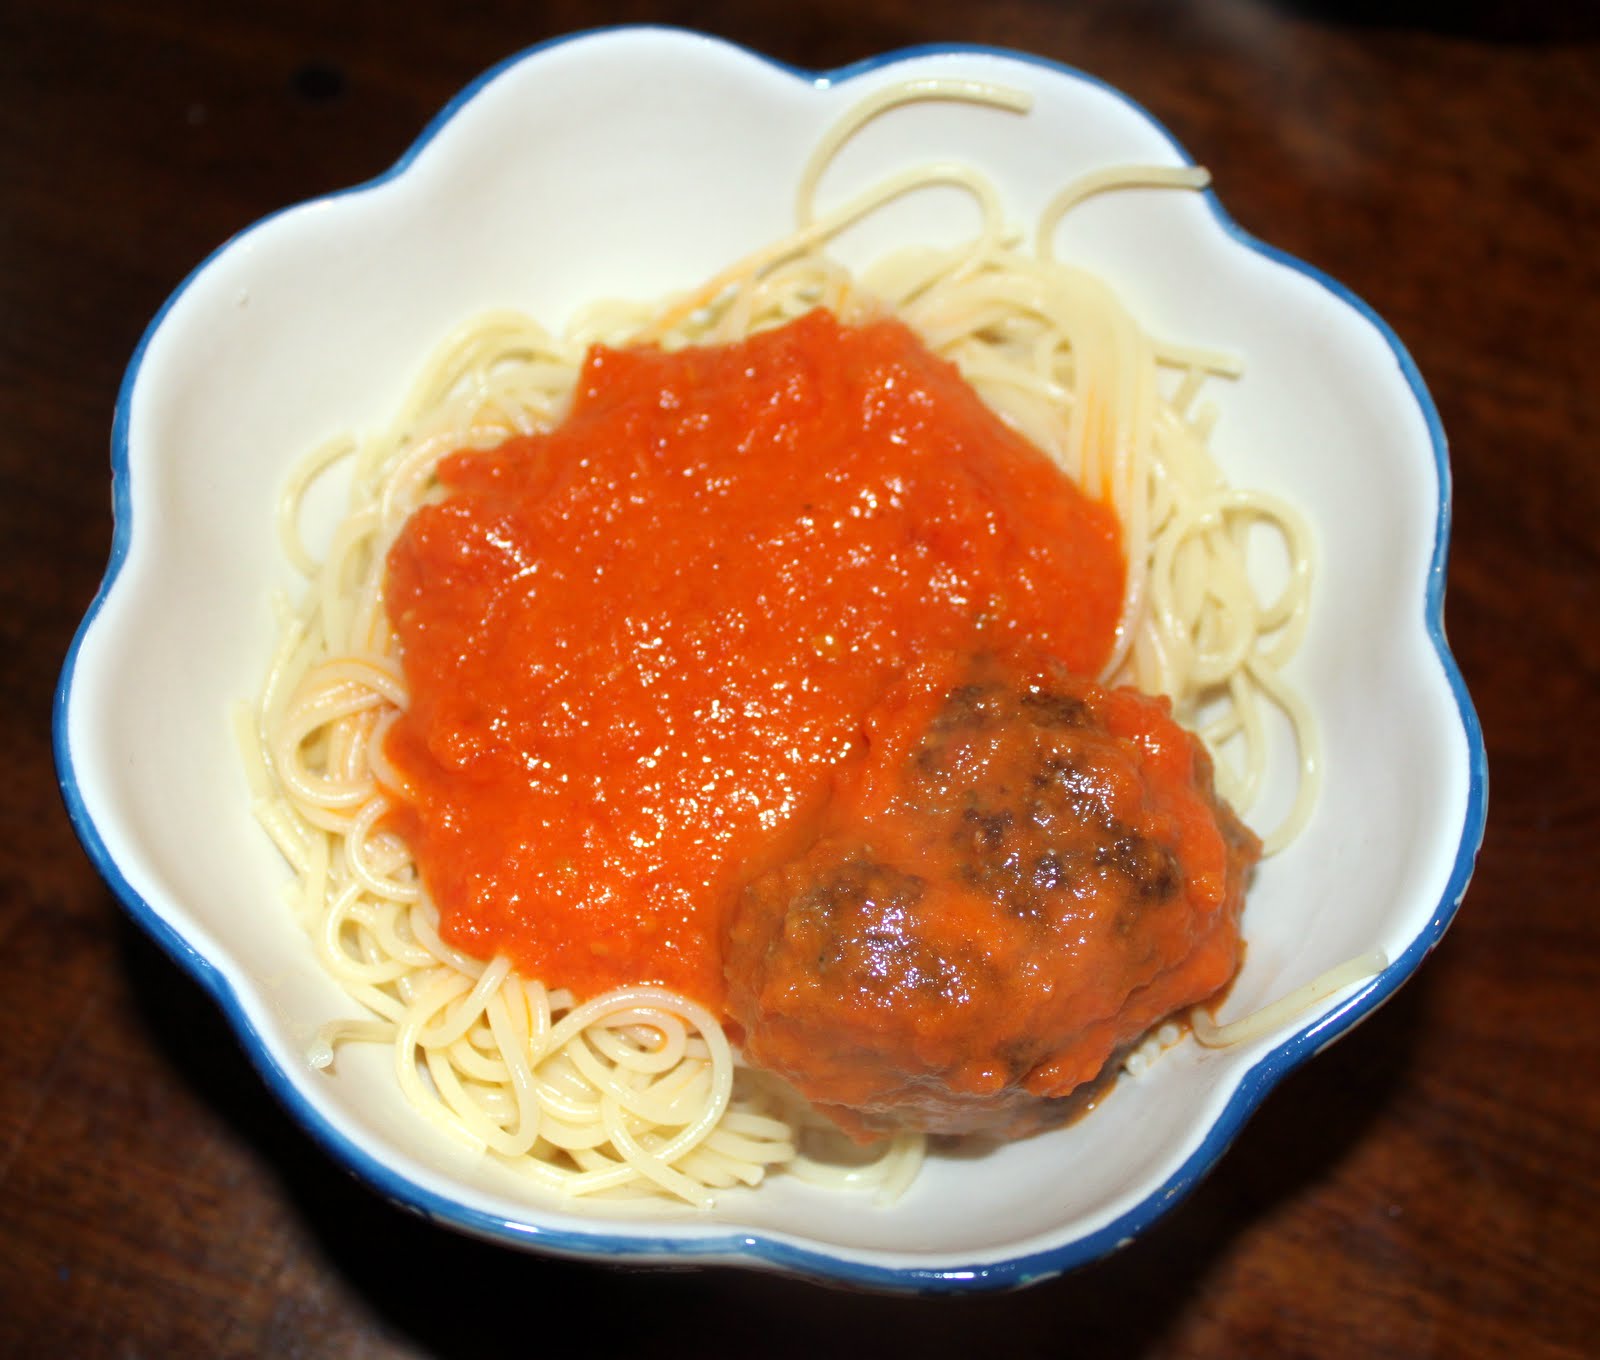
Sneakster Dinners: Spaghetti and Magic Meatballs


Friday, January 6, 2012
By Golly I easily found another delicious way to use kale!  I hate seeing things go to waste in my fridge so when I used half a bunch of kale in the hearty tuscan soup, I was thinking about other ways to use it.  Last night was meatball night and I always like to sneak "good" things into mix meats.  Usually I grate some carrots into my meatball mix so why not chop some kale up like parsley and use that too?  I only used about 4 or 5 leaves because if things get to crazy it will instantly be rejected by Little Man.  So, I removed the stems, chopped it up and threw it in!


My pretty much no fail meatball mix is so easy it hurts me to write it:

1pound ground sirloin (I buy two pounds at the beginning of the week and use half for taco night and half for meatball night)
1 egg
A pour of Worchester Sauce (Count to Three)
3 or so handfulls of Italian Style dried bread crumbs
1/4 to 1/2 cup low fat grated parmesan (that's what I keep in the house but sometimes treat us to a chunk of the real stuff and just microplane a 1/4 cup in)
1 Carrot washed, peeled, and microplaned(grated)
three shakes of garlic powder
pinch of salt & pepper
and the new addition 4-5 stemmed and finely finely chopped kale!


Ball them and brown them in the frying pan using olive oil and roll with your tongs (a new way I tried to ball them this time was to use the ice cream scooper my mother in-law got me from a pampered chef party.  I usually use it for cookies but thought it was worth a try.  They were all pretty much the same size this way).

Pop 'em in a baking dish or on a cookie sheet and into the oven at 350F for about 30 minute or longer... you cant really hurt them to much.

I really wanted to make a quick spaghetti sauce to go with them and it is certainly hard for me to pass up Smitten Kitchen's Tomato Sauce recipe that we probably all know by now.  She suggests using San Marzano tomatoes but we prefer Tuttorosso.  It's pretty much all the effort and time that I had at the moment and I think it's delicious.

The Smitten Tomato Sauce is so yummy (and by the way delicious on chicken parm)
onion tomatoes butter that's it!
Cook on stovetop for 45 minutes squishing the tomatoes and stirring every once in a while.

My husband does not like chunky sauce so I always whip it a little for him to get the chunks out.  


Cook the meatballs for a bit in the pot
 Et Voila:


The response was, well, amazing.  Little Man ate THREE meatballs and the Baby ate TWO!  Really!  They are decent sized!  My husband and I really enjoyed them as well.  Dare I say that kale will be added to the grocery list?  At $1.05 for the bunch I don't see why not!

I'm thinking the butter and parmesan pretty much counter-acted the kale and carrots... but OH WELL it was TASTY!

Spiral Top Little Man Hat


Thursday, January 5, 2012
I taught myself to knit my junior year of college following along a little starter kit from Walmart when I wanted to to add some fiber art to my resume.  Which of course never really ever took shape other than the idea sitting in my mind. For years I have started little projects here and there, my husband always joking that I have never actually finished anything.  I should have figured out a long time ago that scarves take a long time to knit!  So, as this winter season approached I decided I must accomplish a smaller goal and that would be to start knitting hats, shorter timeframe to make and also consistent with my skill level.  I wasn't sure I was going to find the look I wanted by searching the internet so I decided to just wing it a bit and after picking some fun colors of alpaca (I drove a ways to find a nice yarn shop: Out of the Loop), and would write the pattern out as I went.
So, the big thing about this and really all knitting projects I fail at is the counting! I just have way to much raging through my mind and I without fail loose count. Because I've been knitting for awhile I can kind of use visual clues but the easiest way to make this hat is really just keep a measuring tape near by and just knit until the measurement is what you want. It makes the knitting process so much more fun if you do the least amount of counting possible.

For my little man's hat it was important to measure from the bottom of his ear (I wanted the hat to cover them) to the part of his head right before it starts to round in. For him that was 5" he has a rather large head. If you'd like to try this pattern make sure to take that measurement. It will make your hat fit just right.

Supplies:
#5, 3.75mm circular needles (I use the bamboo ones)
A set of double sided needles the same size
Knitting/tapestry needle
Measuring tape/ruler
I changed colors so I need three balls of yarn but you can easily make this hat with one color and one ball of yarn. I used alpaca because it was so soft and warm

Get it Started:
 Cast on 100 stitches *(this may vary as well. This hat fits my little man who is almost four years old, but the diameter would also fit my husband, it's pretty universal. So, if you know for sure your recipient has a super tiny or uber large head just add or decrease your cast, but try and make sure that it is divisible by 4 that will be important later when thou are rounding off).

Here We Go:
 *Remember you are knitting in the round so make sure that your casts are not twisted and begin with your first knit in the stitch with the knot

 Ribbing 
Beginning with the color you want the majority of the hat to be

Rows 1-12 (or until the ribbing measures 1.5"): K1, P1 and repeat

Hat Body 

Rows 13-28
Continuing with the same color
 K in the round for the next 16 rows or until it measures 2"

Rows 29,30
Change to your second color (in this case I used green)
K in the round for the next two rows

Rows 31,32
Change to your third color (orange)
K in the round for two rows

Rows 33,34
Change to your original color (blue)
K in the round for two rows

Rows 35-40 Repeat the last six rows
 Total of twelve rows

You are going for this striped look:
Rows 41-50
Continue with your original color for 10 rows about 1.5" or until your hat measures the length you measured from the ear. In my case a total of 5" from the bottom of the folded ribbing to the beginning of where I'd round off the top of the hat.

The Spiral Top:
Continuing with the same color
 *at some point it will become to hard for you to continue on your circular needles at which time you will knit with your double sided needles to make your life much easier

 Row 51
(K2together, K23)and repeat another three times until you are at your starting point

 Row 52 (K2together, K22)and repeat in the same manner as above

 Row 53 (K2together, K21) repeat x3 total 4 and you continue for approx.the next 15 rows decreasing your number of knit stitches until you have eight stitches left.

At which time you use your tapestry needle to finish Now you just take care of your strings and your done!


 *to help your ribbing stay in place you could stitch it or take out your best friend the iron and show it whose boss(follow your yarns instructions you may need to cover with a towel)

 *this looks like a lot but it's really fun and easy once you get your rhythm so stay with it and cover your entire families' heads!

*On a side note I think this hat needs a Pom Pom! I will link up to that post once I add it!

Let me know if you need help or get stuck!

A Very Hearty Tuscan White Bean Soup


Wednesday, January 4, 2012
My first attempt at soup making began two nights ago when my husband requested the hearty Tuscan white bean soup recipe from Cooks Illustrated's: Soups, Stews, and Chilis. I liked the choice because it included things I had never done (soak beans, ingest kale) and I decided to add some chicken to the recipe to turn it into a meal for the whole family. The baby would receive some white beans, carrot and chicken from the soup and The little man would get a personalized bowl of soup heavy on the beans and chicken and minus the kale and tomatoes which were immediately rejected due to color alone.

The recipe called for dried white beans which meant that I had to sort threw them and pick out any bad ones I saw and then soak the pound of beans in a salt water bath that consisted of 16 cups of water and three tablespoons of salt for at least eight hours or up until 24 hours. Making sure to rinse thouroughly before adding them to the soup. They looked like this the next day when I was done soaking:
While the boys were taking there naps I chopped everything up and began to cook the bacon (the recipe called for pancetta but the butcher at the grocery didn't have it) in our dutch oven on the stovetop in the bit of oil for about eight minutes. When it started looking a nice brown I added the onions and celery and cooked for another twelve minutes:

I then added the garlic and cooked for about 30 seconds until it became fragrant (and boy was it!). I quickly added the broth, water, bay leaves, and the rinsed beans and turned up the heat to medium-high until boiling at which time I threw the cover on it and popped it in the oven to cook for bout 50 minutes.

I took it out of the oven and added the chopped kale, carrots, and diced tomatoes which really looked lovely together:


Then just put it back in the oven for another 30 minutes. Out it came, I pushed the sprig of rosemary down into it and covered the pot and let rest for 15 minutes. Then I uncovered and fished out the bay leaves and rosemary and chucked them. I added salt and pepper (frankly maybe a little too much pepper). The soup was done

et voila:

I baked a chicken breast for 40 minutes that I marinated in italian dressing chopped some pieces up into bits and added some to each of our servings: The rest of the soup I div-eed up for my husband's lunch and had about four servings left and threw it in the freezer so we'll see how that does on re-thaw.

I enjoyed this soup because it was pretty much a meal (we each had a dinner roll too), it got me to try kale which was actually kind of tasteless so I felt good about that and healthy, and although it seems like a lot written out it really wasn't hard. Next time I think I would add more bacon (I really didn't catch any of that flavor in my bowl and I'm a big fan of bacon). To me the skins of the beans were a little to noticeable so I'm going to do a little research on beans to see where I went wrong there.

Now what to do with the other half of the bunch of kale?

Ingredients:
4oz bacon (or 6oz pancetta)
1tbsp evoo
1large onion, chopped med
2 celery ribs, chopped med
8 garlic cloves, minced or pressed (I pressed but my fingers still smell)!
5cups low-sodium chicken broth
3cups water
1pound dried cannellini beans, salt soaked and rinsed
2 bay leaves
1 (14.5 oz) can diced tomatoes drained and rinsed
1/2 bunch of kale stemmed and chopped into 1 inch pieces
2 carrots, peeled and cut into 1/2 inch pieces
1 sprig fresh rosemary
salt and ground black pepper